Configure sync settings
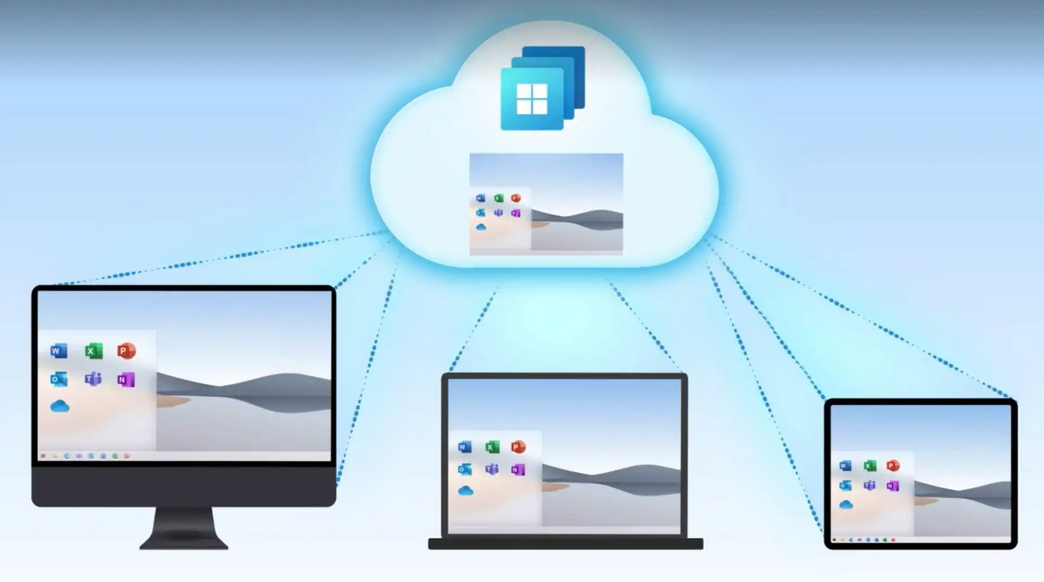
Windows 10 includes a feature that allows a copy of your device settings to be securely stored in your Microsoft account. This feature was first introduced in Windows 8. When a user signs into a device using the user’s Microsoft account, the settings are pulled down from the cloud-based account and applied to the device. Settings are kept synchronized, and any new profile changes, such as a new theme or change of wallpaper, will take effect on other devices following the user log-on process completion.
Users appreciate the unified experience across their Windows devices and that they do not need to configure settings on all their devices. This saves users time and effort and increases their productivity with minimal administrative effort.
On a newly installed device—or after the first time you add your Microsoft account to the device—you may be presented with the following warning within the Settings app when you try to enable Sync settings:
Click here to view code image
Your passwords won’t sync until you verify your identity on this device.
To sync passwords, you are required to verify your identity using an alternative email account that you have previously set up; doing so helps protect your Microsoft account.
When you’ve enabled the Sync setting, Windows syncs the settings you choose across all your Windows 10 devices that you’ve signed into with your Microsoft account.
Note Enterprise State Roaming
You can also synchronize user and app settings for a work or school account using a feature called Enterprise State Roaming. This needs to be enabled by an administrator and requires users to sign in using an Azure Active Directory account rather than a Microsoft account. Enterprise State Roaming is covered later in this chapter. (See “Configure Enterprise State Roaming in Azure AD.”)
To enable device Sync settings on Windows 10, follow these steps:
- Open the Settings app.
- Select Accounts.
- In the Your info section, ensure that you have signed in using a Microsoft account. If you have not, you can click the link on screen to sign in using a Microsoft account. If you do not have a Microsoft account, you can click Creating a Microsoft account to create one.
- Under Accounts, select the Sync your settings section.
- Under Sync settings, toggle the setting to On, as shown in Figure 2-11.
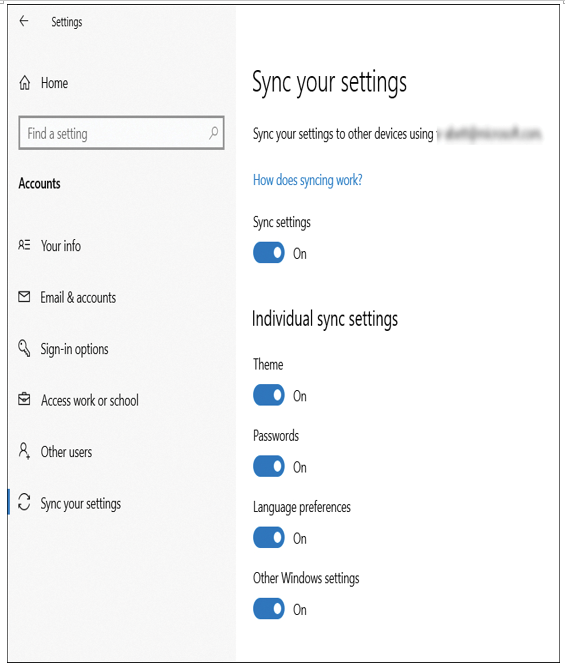
Figure 2-11 Sync Windows settings
6. Under Individual sync settings, you can turn on or off the following settings:
- Theme
- Passwords
- Language Preferences
- Ease of Access
- Other Windows Settings
The settings that are synchronized are extensive and can certainly reduce the user effort when configuring additional devices for use. Table 2-11 displays some of the categories and common settings that are included on a Windows 10 desktop device.
TABLE 2-11 Windows Sync settings
| Group of settings | Setting |
| Other Windows settings | Mouse: Change the size of mouse cursor Change the color of mouse cursor |
| Theme | Accounts: Account Picture Desktop Personalization: Desktop Theme (background, system color, default system sounds, and screen saver) Slideshow WallpaperTaskbar Settings (position, auto-hide, and so on) |
| Passwords | Credentials: Credential Locker WiFi: WiFi profiles (only WPA) |
| App-Specific | App data: Individual Apps Can Sync Data Command prompt: Command prompt “Defaults” settings |
| Internet Explorer browser | Open tabs (URL and title) Reading List Typed URLs Browsing History Favorites Excluded URLs Home Pages Domain Suggestions |
| Ease Of Access | High Contrast: On or Off, Theme settings Keyboard: Users can do the following: Turn on/off on-screen keyboard Turn on sticky keys (off by default) Turn on filter keys (off by default) Turn on toggle keys (off by default) Magnifier: Turn inversion color on or off (off by default) Tracking (follow the keyboard focus) Tracking (follow the mouse cursor) Start when users sign in (off by default) |
| Narrator: Quick launch: Change Narrator speaking pitch Turn on or off Narrator reading hints for common items (on by default) Turn on or off whether they can hear typed characters (on by default) Turn on or off whether they can hear typed words (on by default) Make insert cursor follow Narrator (on by default) Enable visual highlighting of Narrator cursor (on by default) | |
| Play audio cues (on by default) Activate keys on the touch keyboard when you lift your finger (off by default) Ease Of Access: Set the thickness of the blinking cursor Remove background images (off by default) | |
| Language | Date, Time, and Region: Automatic Time (Internet Time Sync) 24-Hour ClockDate And Time Daylight Savings Time Country/Region First Day Of Week Region Format (Locale) Short Date Long Date Short Time Long Time Language: Language Profile Spellcheck (autocorrect and highlight misspellings) List Of Keyboards Typing: Spelling Dictionary: Autocorrect Misspelled Words Highlight Misspelled Words Show Text Suggestions As I Type Add A Space After I Choose A Text Suggestion Add A Period After I Double-Tap The Spacebar Capitalize The First Letter Of Each Sentence Use All Uppercase Letters When I Double-Tap Shift Key Play Key Sounds As I Type Personalization Data For Touch Keyboard |
Need More Review? Windows 10 Roaming Settings Reference
If you want to review all the settings that will be roamed in Windows 10, use this Microsoft website: https://docs.microsoft.com/en-us/azure/active-directory/devices/enterprise-state-roaming-windows-settings-reference.
The following device settings are not able to be synchronized across devices:
- Accounts: Other account settings.
- All Bluetooth settings.
- Desktop personalization: Start screen layout.
- All lock screen settings.
- Mouse: All other settings.
- All Power and Sleep settings.
The new Microsoft Edge Chromium-based browser released on January 15, 2020, allows users to customize the sync settings within the app. Users can enable or disable the Microsoft Edge browser sync settings by following these steps:
- Launch Microsoft Edge.
- Select the Settings menu (represented by three ellipses).
- Select Settings (represented by a cog or gear icon).
- On the Profiles tab, select Sync and click Turn on sync.
- You can then select which items to sync from the list, as shown in Figure 2-12.
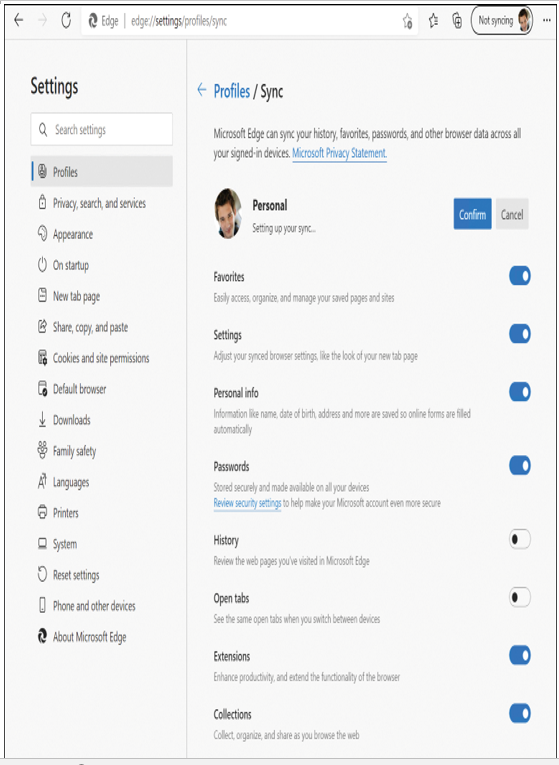
Figure 2-12 Sync Microsoft Edge settings
- Click Confirm to enable the sync. You should see a tick in a green circle indicating that the sync is enabled.
- Close Microsoft Edge.
To remove a device associated with your Microsoft account and remove the cloud backup of your personal settings, follow these high-level steps:
- On all the devices connected to your Microsoft account, turn off synced settings in the Settings app.
- Open a web browser and sign into your Microsoft account at https://account.microsoft.com/devices.
- If you have multiple devices, select the device that you want to manage and click Show details.
- At the top of the device page, click Manage and then select Remove PC.
- On the Remove your PC dialog box, select I’m ready to remove this PC and click Remove.
- On the PC removed dialog box, click OK.
To remove all cloud-stored Windows device settings that are associated with your Microsoft account and synced across all your devices, you should select the Clear synced settings option on the https://account.microsoft.com/devices page and choose Clear.